

Get the most out of HDR HERO.
Here's how to capture a technically clean 3-frame exposure bracket that HDR HERO merges perfectly.
 Sales-ready−2 EV0 EV+2 EV
Why shoot an exposure bracket at all?
Interiors span an enormous brightness range: dark corners on one side, blazing bright windows on the other. A single frame can never hold both at once — you lose either the window or the shadows.
 Shadows crushed
Exposed for the windows
The view looks right — but the room sinks into darkness. Corners and furniture lose all detail.
 Windows blown out
Exposed for the room
The room is bright — but the windows are pure white. The view and the daylight mood are gone.
 The bracket, optimally merged
Both in one image
The bracket covers both: HDR HERO takes the detail from every exposure and merges it into one balanced, sales-ready image.
What you'll need
Four things — that's it.
Camera with AEB
Any DSLR or mirrorless that can shoot an automatic exposure bracket.
Mode Mor A/AvWide-angle lens
Shows the room generously without distorting it — the biggest lever for the shot.
10–24 mmSturdy tripod
Holds the camera still so the three frames line up cleanly. A geared head is ideal.
geared headRemote release
Or a very steady hand. Keeps your hand off the camera at the moment of capture.
optional 2-sec timerThe perfect 3-frame bracket in five steps
Set it once and you'll repeat it per room in under a minute. These five moves are all that stands between you and a clean bracket.
Camera on the tripod
Mount the camera on a tripod — roughly chest to eye height. Stable means three matching frames that overlay cleanly.
Lock ISO & aperture
Set ISO 200–400 and aperture f/8–f/11 — and leave both unchanged across all three frames.
Set the bracket (AEB)
Enable auto exposure bracketing at ±2 EV. That gives three frames: −2 (dark), 0 (normal), +2 (bright).
Release without shake
Use a remote release or the 2-sec timer — at the moment of capture, no hand on the camera, or at most a very steady one.
Shoot — done
Your 3-frame bracket is in the bag. Upload it here — HDR HERO detects and merges it fully automatically. The result: a perfect, pro-quality HDR, ready to sell.
Keep your lines straight
Vertical and horizontal edges in the room should run as parallel as possible to the edges of the frame. That prevents “converging verticals” — and keeps the room's size and proportions reading naturally.
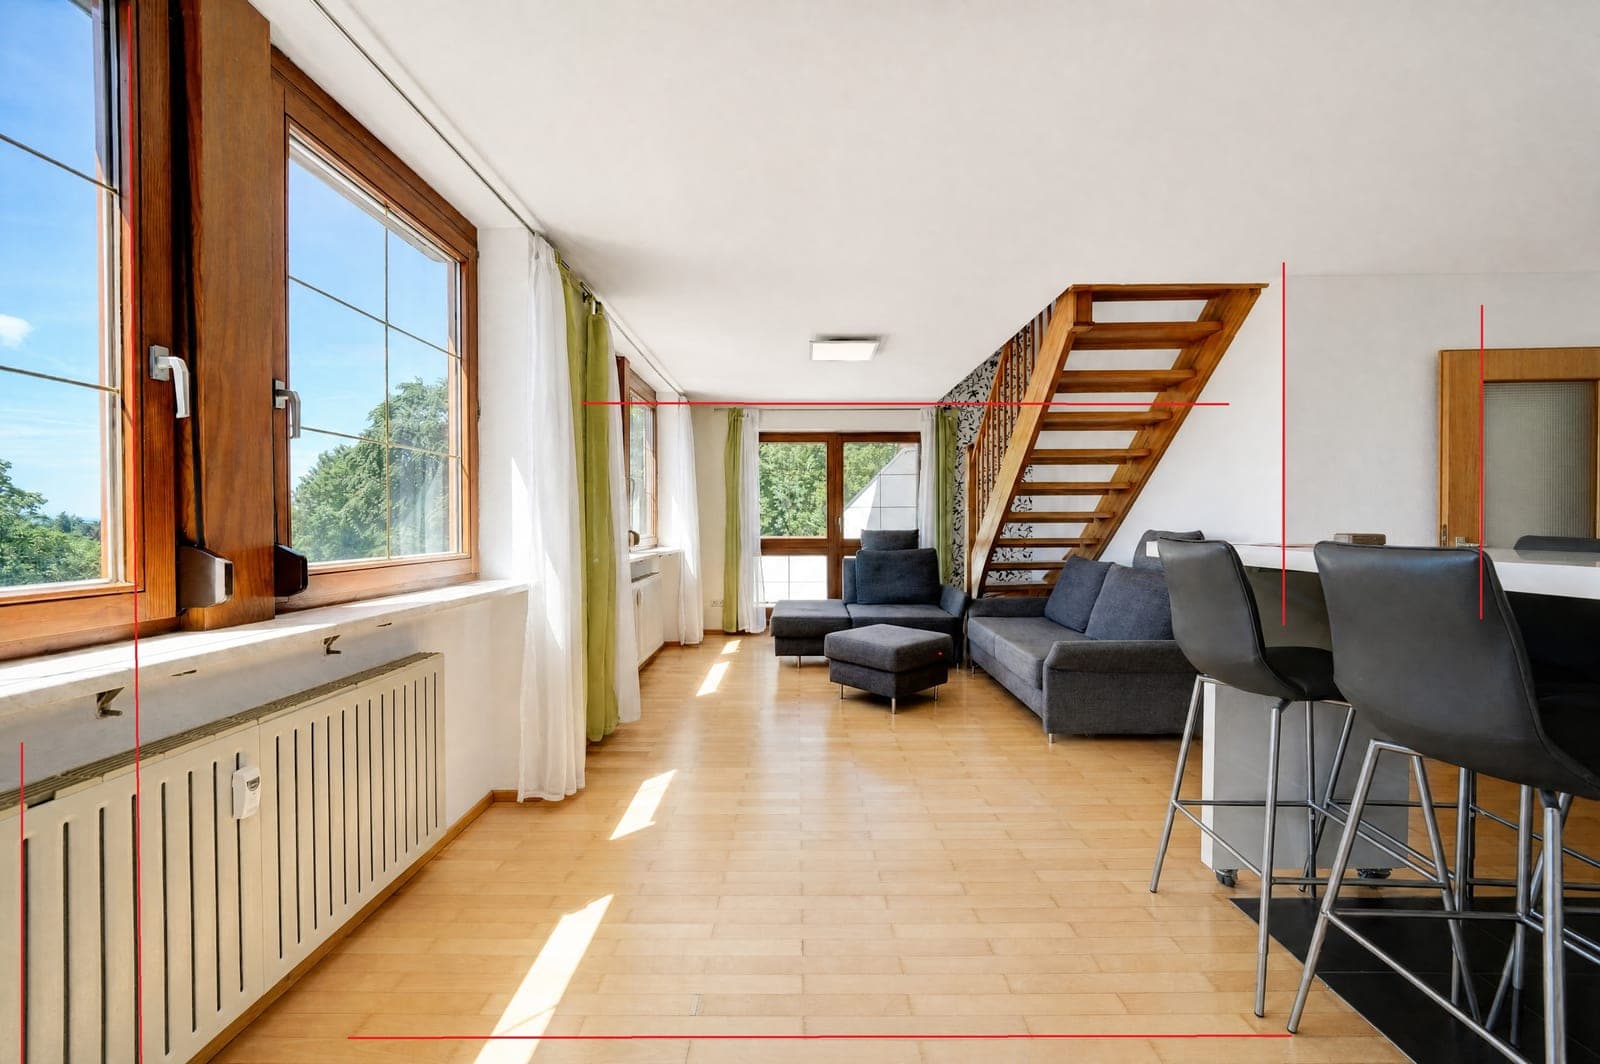
- Verticals truly verticalDoor frames, window edges and wall corners stand square to the frame.
- Keep horizontals parallelWindow sills and furniture edges run parallel to the top and bottom edge.
- Don't tilt the cameraKeep the sensor level at hip-to-chest height — don't angle it up or down.
Converging verticals appear the moment you tilt the camera: walls seem to fall inward and the room looks distorted. Straight lines reveal the true size best.
Camera settings at a glance
Stick to these values and HDR HERO has everything it needs for a clean merge.
- ModeAv + AEBPro: M
- ISO200 – 400
- Aperturef/8 – f/11
- Bracket−2 / 0 / +2 EV
- FormatRAW or JPEG
- ReleaseRemote / 2 s
- TripodRequired
Why f/8–f/11?
In this range your lens is sharpest and the whole room stays in focus — from the edge of the sofa to the window. Important: never change aperture or ISO between the three frames, or they won't match.
Common mistakes
“Garbage in, garbage out” applies here too. These five pitfalls cost the most quality — and all are easy to sidestep.
Shot without a tripod
Handheld, the three frames shift against each other — the bracket won't overlay cleanly.
Changed aperture mid-bracket
Change the aperture and you change depth of field. Set it once and leave it.
Cranked up the ISO
Higher ISO brings noise into the dark corners. Stay between ISO 200 and 400.
Too little spread
With very bright windows ±2 EV sometimes isn't enough — widen the bracket so the windows keep their detail.
Released by hand
A finger on the shutter shakes the shot. Use a remote release or the timer.
One bracket in, a finished HDR out.
Upload your first bracket — HDR HERO merges it into sales-ready web and print images. The first ten series are on the house. Failed runs don't count.